Project Based Learning: How to Get Started
|
Project Based Learning Defined
Having all students buy into the curriculum by doing and participating, rather than passively listening or fearing a bad grade. That is PBL. You learn for life when you are actively engaged. We all remember cramming for tests and getting an A, but do you remember what was on that test?
|
Jeffrey Robin has been teaching high school for 27 years. He is a founding faculty member of High Tech High in San DIego and has remained an active collaborative project based learning teacher at HTH. He also leads PBL workshops around the world and remains a practicing artist.
|
How do you do create a PBL classroom?
- Create an environment where students do
- Review and revise for a real purpose
- Show others their work
There are a lot of things to do, I am giving a distilled list so you are not overwheled or turned off by too much Ed Speak
The first thing you need to do is “Do something.” Whether you're a teacher or an administrator you need to:
- Do what you know
- Do what you have studied
- Do what you are going to have your students do before you have them do
Watch this animation please.
Doing something is the key. You learn so many thing that you could never know by just talking or giving an assignment. The act of doing and showing what you have done or made and created brings a real world authenticity to your students and the school community.
Here we go!
This course will have you define the intersection of your educational and personal passions with what you really like to do. This way you can develop an authentic educational projects for your students to do in your content area. Then you will “Do Something”, documenting your process and your exemplars. Finally you will develop a management plan that will enable your students to be successful and make beautiful work.
Class Objectives
- Find out what you really want to teach that will authentically engage the learners
- Do the project yourself, first!
- Create a structure for all of your students to successfully complete the project
- Shed the Twentieth Century ideal of what education should be and create your own meaning of what education can be.
Think about these questions as you work?
- Is it fun?
- Am I getting bored?
- What is keeping me from being successful?
- Did I finish in the time I expected?
- Does my work make sense?
- Did this get my point across?
- Does it meet my personal learning goals?
- Will I be able to do this with all my students/teacher?
- Is it sticky?
- Can I make it sticky?
- Differentiations: Are there ways to ratchet up the assignment or to simplify it for different kinds of learners?
The list could go on and on, however there is one thing for certain if you don’t do what you ask your students to do you will never know, until it is too late. Our goal is for:
Our assignment to become their projects (that they own) and
We want beautiful work on time.
|
Some advice and insight
I need to say this because many apologists say, “it is good to fail, you can learn a lot from failure!” That is true, and your students would then need to figure out what went wrong and become successful. But the teacher needs to plan for the kinds of failures that occur with their students. If the teacher planned well, time to fix failures is built into the project. That is one more reason to do the whole project yourself, first. I dislike that PBL hinges here in the beginning with adults doing something. It’s not that I think adults can’t do things. I am an adult and I am busy with work, family and life. I have already been to school why do I have to do it again. How come this art teacher from San Diego is telling me to do this? I have been down this road twice a year for 17 years with 34 plus projects, 20 partners, you can try to do PBL without doing it yourself first, but you will not be successful, and success is having all students participate in the project and creating something that they are proud to exhibit. |
Assignment One:
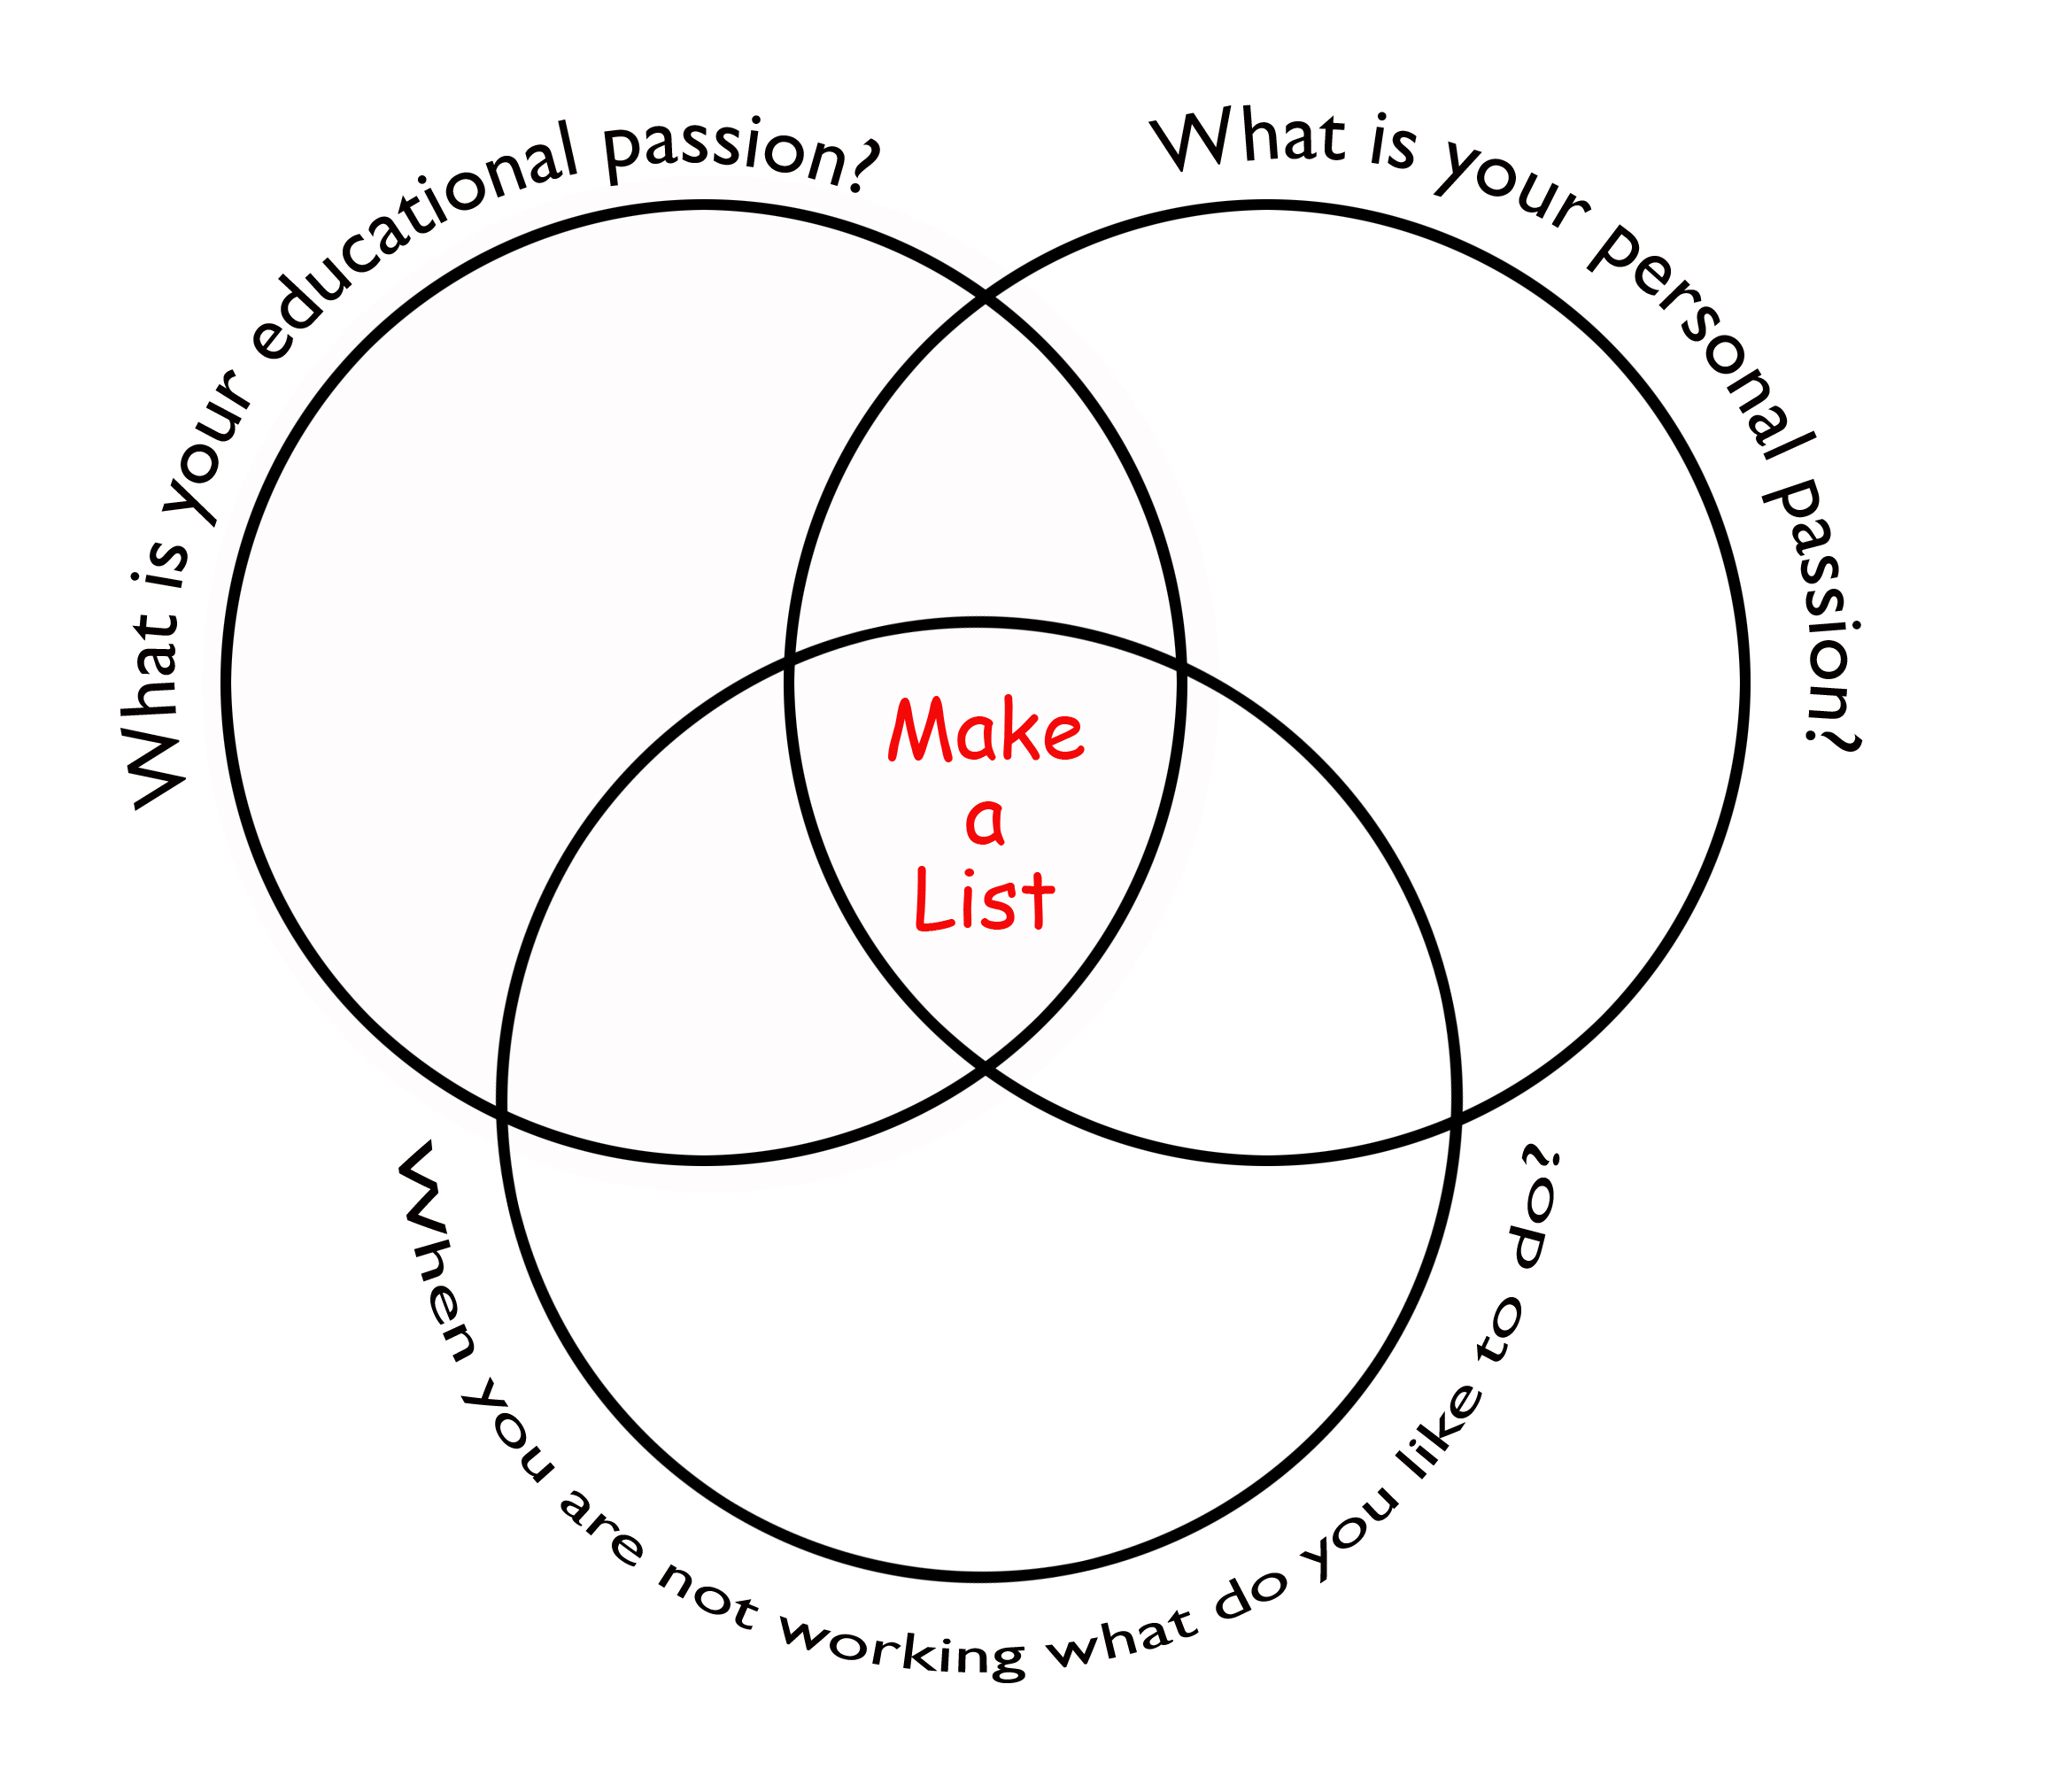
1. What is your educational passion?
2. What is your personal passion?
3. When you are not working what do you like to do?
In a venn diagram answer these question and then write a list of things that could fit in the intersection of things that you could “do” that would encompass all of these passions.
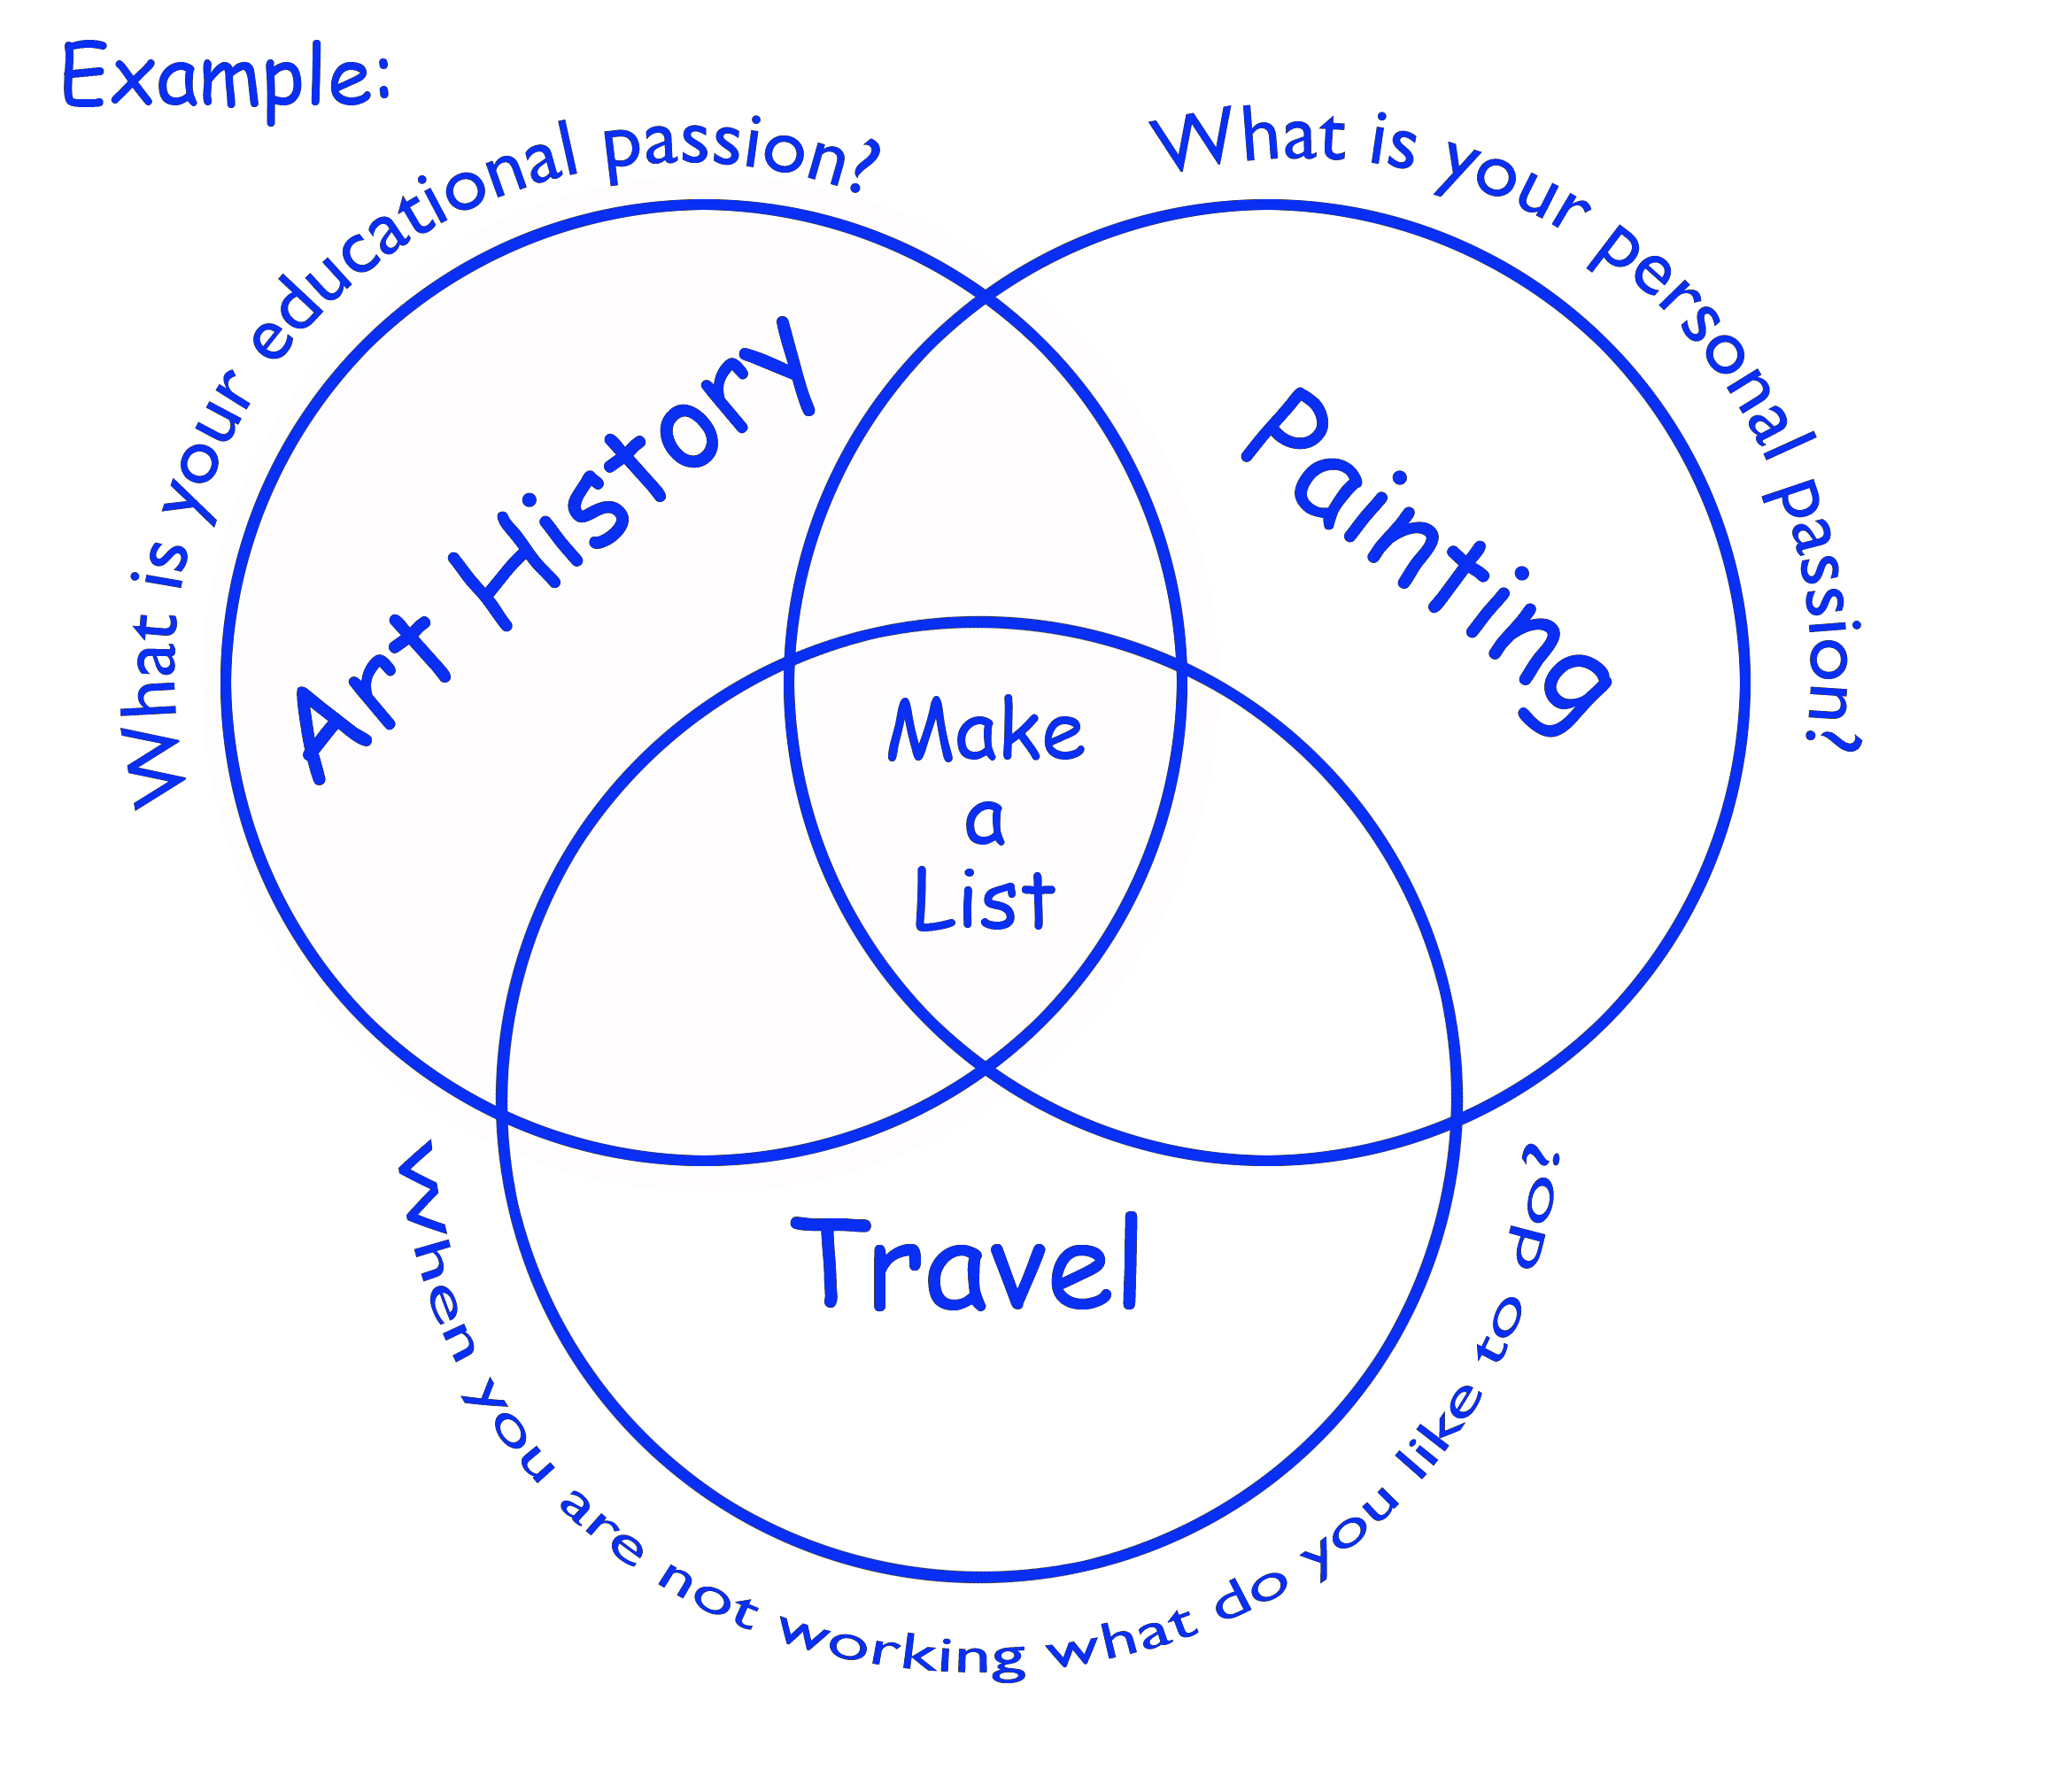
Here is my EXAMPLE. I always do the project or assignment myself, no matter how big or small.
Example: My list of things I could do to cover my answers:
- Mobiles of themes in Art History. Inspired by visiting the Getty Museums
- A Bite of the Norton Simon. Painting a piece of a painting at the the Norton Simon
- Post Christo. Design and decorate a space, the opposite of what Christo did.
- Digital-Baroque. Visit museums and have the students find Baroque paintings and digitally alter them in Photoshop and then paint the new digital image.
- Write yourself into Art History. Study art history and find an artist. Do art like them and using your paintings write the art history text for them and then make three of your own paintings writing yourself into history as well.
Compile your own list, at least five different ideas. Think about your passions and how to motivate all your students. Doing and having fun should be on the top of your list. If you are collaborating with another teacher, is there an authentic bridge to their subject area too?
Determine the idea that most appeals to you. This is important, not the idea but make a determination that you are going to do something. If it is a bad idea do another one, but you have to be determined to do something.
Determine the idea that most appeals to you. This is important, not the idea but make a determination that you are going to do something. If it is a bad idea do another one, but you have to be determined to do something.
Assignment Two:
- Do the project: Write down what you think you are going to have when you are finished. What will you have learned during this process? There will be many more learning experience that you can add to this list after you complete your project.
- Think about your learning goals, subject area, is this fun for your students and is it fun for you while designing and doing this project.
- Save and document all your research, prototypes and experimentation. You will use this to (A) Show your students (B) Help you make a Management plan (C) Figure out where you went wrong
(Please do the project yourself first!, you will be sorry if you don’t.)
Example: Write yourself into Art History (Part 1)
Write yourself into Art History (Part 1)
I need to pick an artist. I know many, unlike most of the students. This is something to think about: How will I get the students to choose wisely? I think I want them to use modern masters ie after 1850, post photography. An artist that I have alway enjoyed but have never researched is David Hockney. As I checked on the internet he has had multiple painting and photographic styles. He has a deep connection to art history and technology. I looked at Wikipedia and then I got a book at the library, “Hockney Secret Knowledge”. After reading and looking at his work over a lifetime, I think his work is about multiple point perspective.
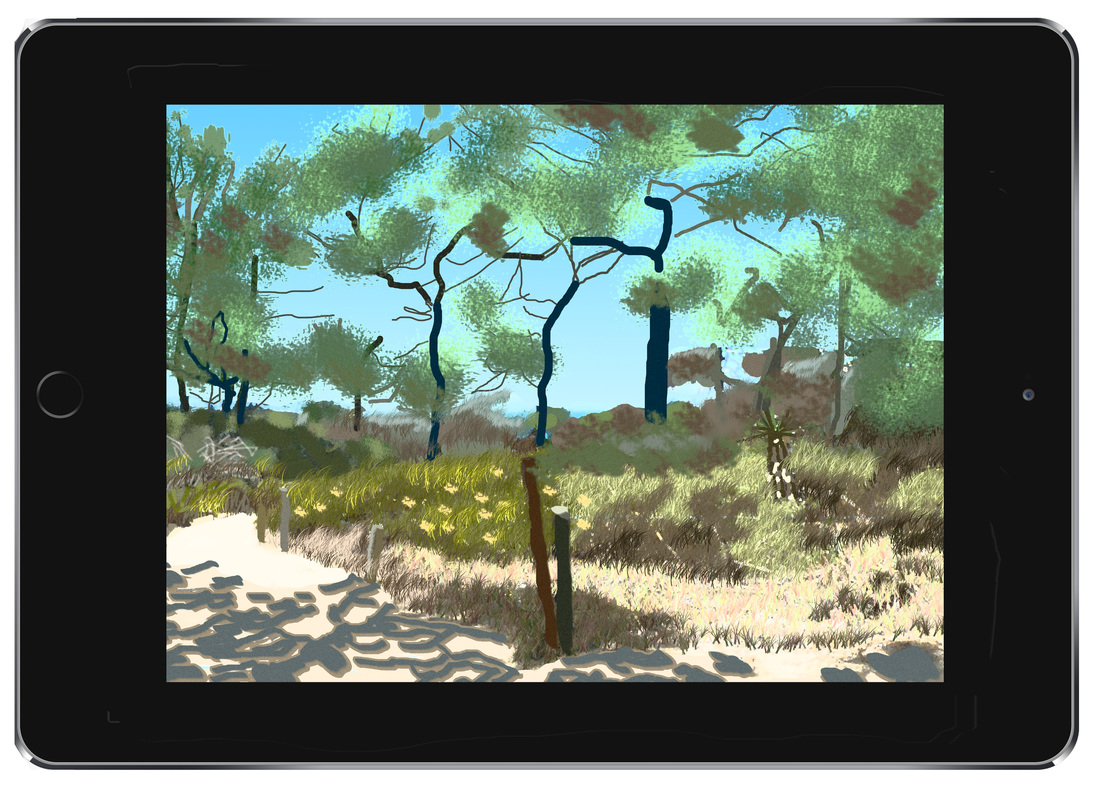
From his Mulholland Drive painting like 10th century Japanese paintings to his “Joiners,” a collage of photographs that together build an image and from different angles and multiple points of perspective. His life's work of multiple point perspective come together in his iPad paintings. The app he uses, “Layers,” allows the artist to have the image on a layer so that you can move the source image to where the artist needs it. You can also paint at night, which is a really cool groundbreaking perspective. This is another important aspect about the project: The students need to find a theme in the artist’s work.
Here are the works that I made in Hockney’s style.
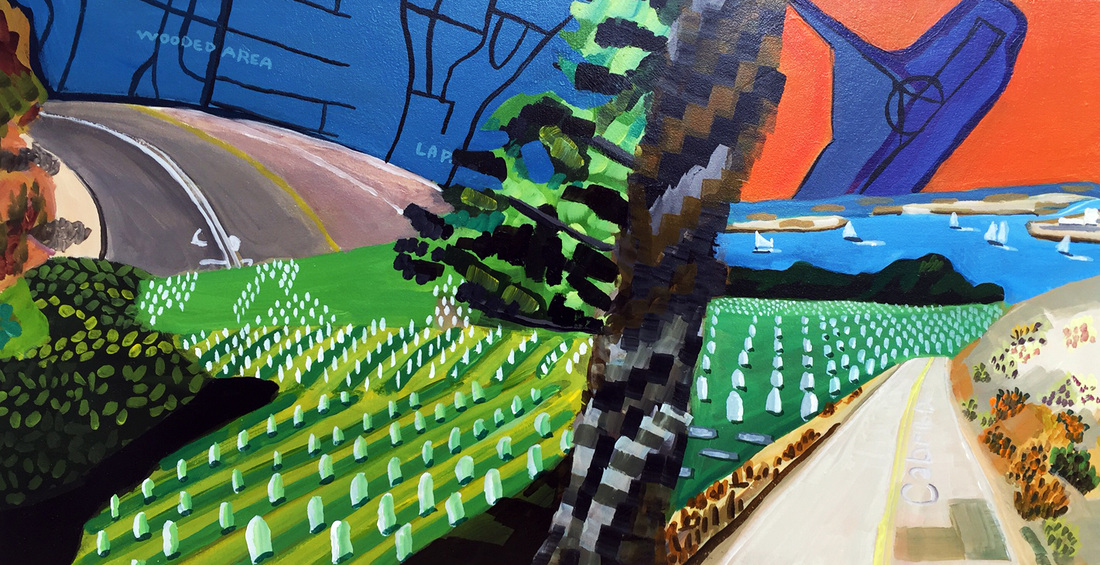
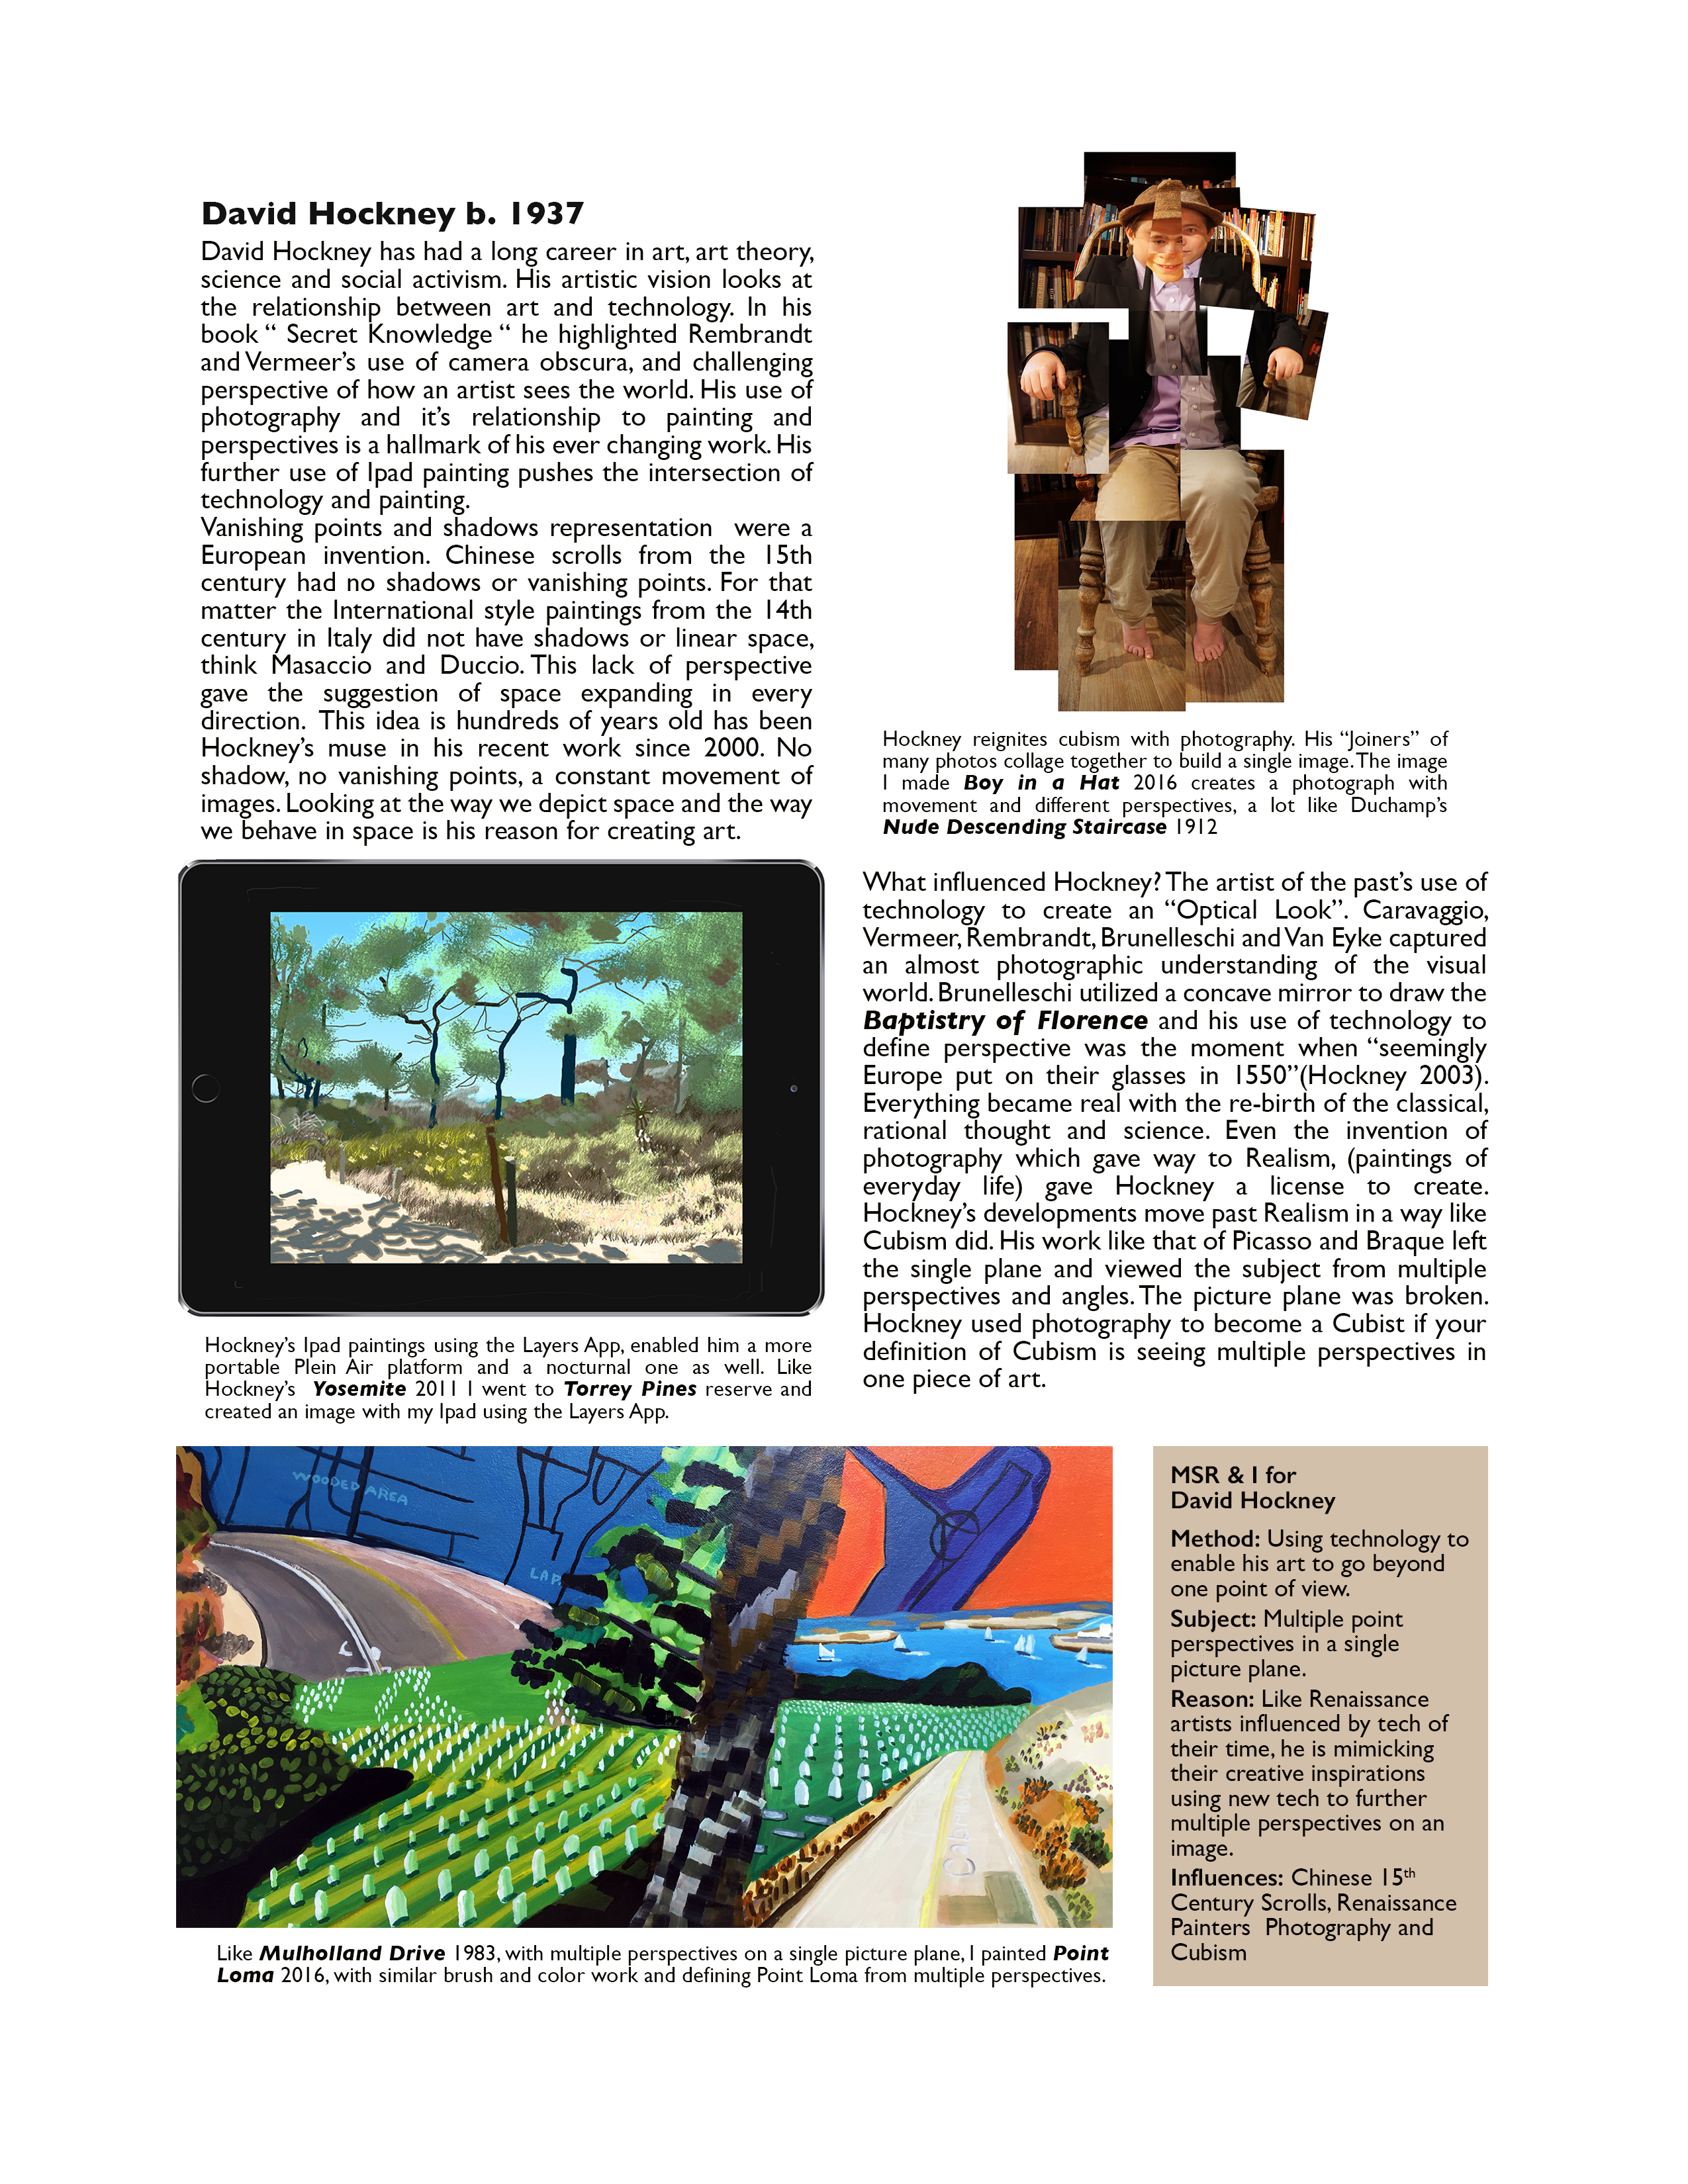
Point Loma, this painting is after Hockney's Mulholland Drive. Similar to the Hockney, this painting has multiple perspectives in one picture frame and has loose brushstrokes, free and vibrant color, and it is California, a favorite theme of Hockney's in the 1980s to 90s. All of these source images came from Google Maps; Google didn't exist back then but with his embrace of tech in the last few years I think he would have.
|
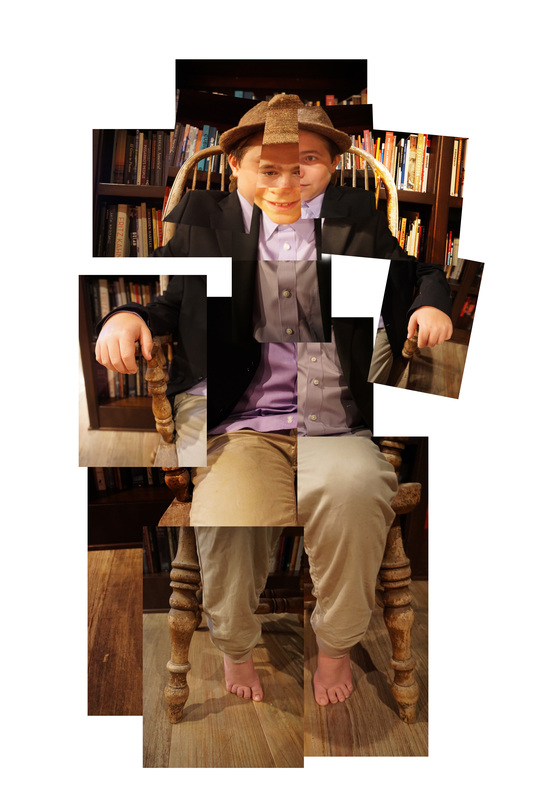
This image, Boy in the Hat, is in the style of Hockney's multiple perspective photo collages where he used multiple photos to create a large image that represented the image. This is clearly where Picasso's analytical cubism influenced Hockney's MSR (Method, Subject & Reason).
|
"Hockneyesque" Ipad painting using the Layers app enables quick and easy plein air painting in daylight or at night. This use of technology is Hockney's equivalent to the Renaissance and Baroque painters use of the camera obscura. This is my interpretation of his style.
The next step is to write about Hockney like I am an historian. This could be messy, with so many different students I probably should set up specific content areas for them to cover. Something to think about, How will I have a similar content about each artist so that this book feels cohesive?
The way I handled it was to explain the theme of the artist's work and then explained his method of creation, subject of his work and the reason he created what he did. Method, Subject and Reason* is what I feel as the teacher is the least they should know about the artist and their work. Here is my example of the page that I made and I will have my students make. *Method, Subject and Reason is my distillation of art history or the least you should know. Method- How the art was made, Subject- What is the art about, Reason- The reason for creating the art |
This is what the students will hand in for the first part of this project, three pices of art in the style of the artist they researched and a art historical write up.
Reflection:
I should have made a double page spread not just one page.There is too much information and the images should be larger as it is an art history book. After you do the project you are in a much better place to know the pitfalls, the hard parts and, frankly, was the project worth doing.
Things I learned (that I can see now) doing this project:
The students need to find a theme in the artist’s work. The theme will give
Method, Subject and Reason All students will write about MSR
Require a double page spread for their work
Make small examples of their work There will not be a lot of time to make large works, 48 students making 4-5 paintings, I will need to limit the size of the work.
This was Planning, having an exemplar of the project and a list “have to” and “better not’s”. You will need your exemplars and your list for the next assignment: coming up with a management plan.
Please Read : Planning, Management and Exhibition
Project-based learning is difficult to do well, but it is worth it! (Keep repeating this even when you’re covered in sawdust in the middle of the night on the weekend at school.)
When Ron Berger, the noted evangelist for project-based learning, came to High Tech High for the first time and saw my digital portfolio, he told me how great he thought it was. I was flattered and proud of myself. Then he said, “You should put all your projects online, and all your students’ work too.” Now I work harder showing the work than I do helping my students make it. I refer to Ron as my nemesis, half joking and half serious. But I know that having exhibition as an end goal, and knowing from the outset how the work will be displayed, helps me teach.
Planning, management and exhibition are equally important components of project-based learning. Without planning, the teacher is frantic, the students are bored, and the results are sloppy or non-existent. Without management, the students procrastinate, fall between the cracks, make work that they don’t like, and think the class is a joke. Without exhibition, the adult world connection is gone, the reflective moment is lost, and the money, time and effort of the project are wasted.
We have all offered excuses as to why we did not have planning, management and exhibition (PME) in place, insisting that the project was successful anyway. But when doing a project it makes a huge difference, for example, if you take the time to do the project yourself ahead of time, set every Wednesday as a check-in day, and figure out before the project begins how and where the work will be displayed.
Planning
Project planning can be complicated. You really have to know what you’re asking the students to do and how they will present their project, long before they finish. I always do the project myself first. That way, I can see if it is feasible and worthwhile, and if it looks good. If I can’t do a good job on it, then I figure the students will be at a serious disadvantage.
Here is an example of how I might plan for a semester-long class of seniors (three projects, ending in an exhibition), and what I think about when doing so. Remember: simple instructions beget complex results, while complex instructions limit results.
|
Project: Quote Painting
|
Project 1: Quote Painting
For the quote painting, students select a quote of interest, then illustrate it by painting a portrait of the person who said it. I am thinking it will be election time, and there will be a lot to say. The kids will learn how to alter images digitally and how to mix paint. They will understand that edge is important and value matters more than color. Ironic and humorous quotes will be encouraged, hate speech is unacceptable, and lies are not permitted (spin is lying). The quote painting is a great small project for getting things on the wall fast. It will take two weeks. I’m sure of that because I made one in two hours, and experience tells me that one hour for me equals one week for my students. We will display this work in the entryway at High Tech High. |
|
What Can You Hide in a Book?
|
Project 2: What could you hide in a book?
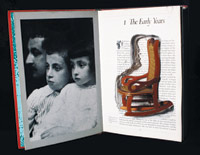
In this sculpture project, students hollow out a book and place something inside. This is a cool assignment because the “book” is hiding something. When I made one, I experimented with six different glues, and the only one that worked well was rabbit skin glue (I really hope that it is just called that). I used a Dremel router to hollow out the book. This project, too, will take two weeks to make. These books will be displayed in boxes on the wall. I have already prepared boxes of many different sizes, and I can easily make more if necessary. Students will brainstorm different concepts that can be represented in their books. We will critique their ideas in class. The students will make mockups in Photoshop of their ideas, incorporating qualities like these: Something disturbing, Something that shows classicism, mythology, social injustice, love, desire, how open-minded you areand more. |
|
Project: Mini Kiosks with Video
|
Project 3: Mini Kiosks with Video Students will begin the project by making a DVD. The subject will be artists and their work, or a variation of this theme—maybe an art style, movement or theme. I’ll have them pick an artist, and if the kids propose a writer or musician, I’ll determine if it is okay. I don’t want music videos; I want thought and artfulness. Working in teams of two, students will have two weeks to complete the DVD. Too much time wasted will kill this project. Then, using graphics from the DVD, they will make a kiosk that will house their DVD and draw people to it. These video kiosks will be placed around the school, near wall sockets so the video can run continuously. I made the kiosk pictured here using a DVD player that my kids had, but we have old laptops around the school that students can use. All three projects will be complete at least two weeks before exhibition night. Each student will write a review of another student’s work for the semester. These reviews will be displayed at the exhibition and on the web, providing a critical view of each body of work. |
Management
To be a good manager you must be consistent. That is hard; however, after freak-out deadlines and poor and incomplete work, I’ve decided to be consistent. It’s easier that way.
Setting Deliverables
I post due dates on the web. This is now more afficent with the advent of Google Classroom
Weekly Check-ins
I make a list of all the things that students need to do by the next check-in, and then they get 10 points if the work is completed on time. I use a receipt book from a restaurant and provide them with copies, so we are on the same page.
Quality Checks
The expectation is that if the student does not do his/her best and work hard, the project will not be displayed. Only three times in the past eight years has a student worked his/her hardest and had a project not turn out. This tells me that working hard is the key that separates the work that goes up on the walls from work that does not. The important thing is to communicate clearly your expectation of hard work the whole semester through check-ins and daily reminders.
Exhibition
Exhibiting projects is a difficult task. Sometimes you get lucky and it comes together on its own. Mostly it takes planning and skill to do it well. I personally have been knocked unconscious hanging a ceramic mobile. I saw stars, and if I had planned it better and thought it out I would have never been in that position, 15 feet in the air on a lift, unconscious.
Disclaimer: I am an artist. I have framed many art shows and hung lots of paintings and prints. I have built houses and have been in and out of construction for 22 years. So, I have an advantage in that I know my materials and how things have been historically displayed. Still, I visit art museums and science museums as much as I can, looking at the art or the science but also noting the way it has been displayed. I read about curatorial theory in Art in America. I check out the way store windows and interior displays are set up for new and creative ideas. What I am saying is you have to keep working. You have to keep looking at the world around you, and the way things are designed, to get fresh ideas for exhibiting student work. There is no silver bullet or magic pill, just experience and the habit of looking at your own work in a critical way.
If you are just starting out and haven’t done exhibitions before, make sure to have the students finish their work ahead of time so you can try different things. If you can lay the work out, you can see what it will look like all together. Symmetry is very important. If all the projects have a similar component that makes them look like a series, or at least pieces tied together in some way, it will be easier to design a display that expresses a coherent idea to the viewer.
|
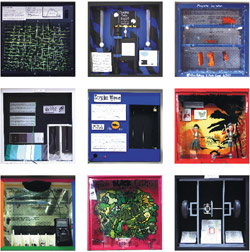
A good example of this is a project I designed last year: Analog Flash for Windows (for a full description, go to jeffrobin.com. In this project, students had to work in pairs to make an interactive art piece that explained a physics or mathematics concept for installation in a 24” x 24” x 5” window box. As you can see here, we got a lot of different results, but they all look connected to each other.
Even if the works are different, you can hang them on the same level, and the cards that explain the work can be hung at the same level. All the descriptions should be written on the same size card, using the same font, size and title format. Go to a museum and take a look: symmetry! Timing is everything. You need to plan to hang and display work, just as with everything else you do as a teacher. Figure that if you think it will take one hour to display a project, it will take three hours. |
All of these things that I have suggested will come together in time, as you start to evaluate the projects you’ve done with your students. You ask the students to analyze and evaluate their work. What would you give a student who handed in late, unfinished, sloppy work that was poorly displayed? Now look at the way you have planned, managed and exhibited your students’ work. What grade should you get?
The easiest and most successful way to teach is to plan. I can’t believe I am saying this! I have really changed. Good Luck!
The easiest and most successful way to teach is to plan. I can’t believe I am saying this! I have really changed. Good Luck!
Assignment Three: Developing a Management Plan.
Project management is the second most important component to PBL, after you have made an exemplar. You know so much now: does the project align with your learning goals? What were the steps you took to have a successful project? Was the project doable? And, most importantly, was it fun? engaging? compelling? interesting?
Please watch: Planning and Letting go.
Answer these questions:
According to the video:
Why is it important to plan?
What is the payoff of good planning?
Other Questions are:
What can you do to keep track of students progress?
What structures can you put in place to have all students be successful?
How will you define success for your students?
Your planning helps you calendar out your project. You need to design a process that your students can follow and no one falls through the cracks or games the system.
Another big problem new PBL teachers go through is bottlenecks, having students waiting around for support, materials, access to tools or waiting for feedback from the teacher. You may have multiple deliverables going at the same time that they can be working on when they are stuck on something else.
An obstacle to effective PBL practices is that teachers often feel that they need to front load projects, giving the students all the information up front. The problem with this approach is that students lose the focus of the project and many become disengaged. And it misses the point of doing PBL in the first place. PBL provides students with the opportunity to realize at points through the project that they need more knowledge, skill or resources to be able to move forward. Setting up a classroom that encourages them to seek what they need when they need it more closely resembles the process adults in the real world go through to accomplish their objectives. Giving the students all the information up front is crushingly boring and you miss the students you are trying to reach, the kids that learns by doing.
Here are the steps for your project management planning.
- Make a Calendar for every day of the project. What will the students be doing and what comes next. First time I had to do this I was angry, I felt like my spontaneity was going to be hampered. Then I realized it made my life and job so much easier. The students and their parents liked it too.
- Exhibit the Deliverables On your website, Google Classroom, Shared Doc, etc develop a digital way for your students to access your Deliverables and your Calendar at home.
- Classroom Visual This is a display of your work that the students can see in class. We want the students to learn and critically understand the difference between good work and work that just isn't finished yet. Seeing your work as an exemplar will give them a tool to develop this skill. This is also a great vehicle for administrators, other teachers and parents to see what is going on in your classroom.
What to Add |
What to keep out! |
The first day experience: Field Trips, doing or making, figuring things out on their own |
Gatekeeping: Reading dense texts, expecting prior knowledge, lecturing |
Show your students what they will be doing and making |
Talking about yourself |
Class discussion about acceptable work and collaboration |
Group Grading: you need to develop a plan so that all students will be evaluated on their own and not brought down by a partner |
4. |
5. |
6. |
7. |
Answer 4-7 what would you add to your plans and what would you keep out?


